Draining the Black and Grey Holding Tanks
Always empty and flush your waste tanks at the campsite or dump station while you still have city water connected (or water in your fresh tank) to run the black tank flush.
- Connect your sewer hose securely between the RV waste outlet and the dump station inlet.
Locate the Grey and Black Tank Dump Valves / Switches inside the utility bay.
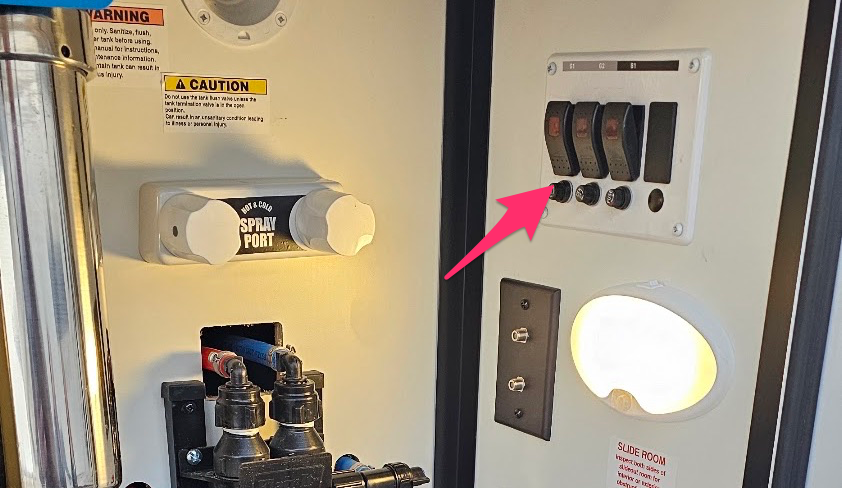
- Open the Black Tank first and allow it to drain completely.
- Connect a non-potable hose to the Black Tank Flush inlet and run water for several minutes until the discharge runs clear in the sight glass. Turn off the water and close the black tank valve.
- Open the Bathroom Grey Tank valve, followed by the Galley (Kitchen) Grey Tank valve. Running the grey water last flushes out the sewer hose.
- Once fully drained, close both grey tank valves, disconnect and stow your sewer hose, and secure the waste cap.
Depressurizing the Plumbing System
Before opening any water line or tank drains, remove pressure from the system and cut power to the heating and pumping components.
- Turn off the 12V Water Pump switch on the interior monitor panel or utility bay.
- Turn off the Water Heater (both the 12V gas switch and the 120V electric switch/breaker).
[Warning] Never drain the hot water tank with the 120V electric water heater switch turned on. Exposing an energized heating element to air ("dry-firing") will burn out the element in seconds. - Shut off the campground City Water spigot and disconnect your fresh water hose.
- Open one hot and one cold faucet inside the rig (such as the kitchen sink) to relieve residual water pressure and prevent airlocks while draining.
Draining the Fresh Water Tank
Dumping remaining fresh water eliminates hundreds of pounds of unnecessary towing weight and prevents stagnant water during storage.
- 1. Locate the fresh water tank drain valve underneath the rig (or in the utility bay/pass-through area).
- Open the valve fully and allow the tank to drain onto the ground.
[Note] Leave a faucet open inside the coach to vent the system and speed up the flow. - Close the fresh water drain valve once the flow stops (or leave it cracked open if storing the rig for the end of the season).
Draining the Water Lines & Hot Water Tank
Draining the hot and cold PEX lines clears standing water from the plumbing runs and can also be used to empty the hot water tank between trips without pulling the anode rod.
Step A: Open the Manifold & Low Point Drains
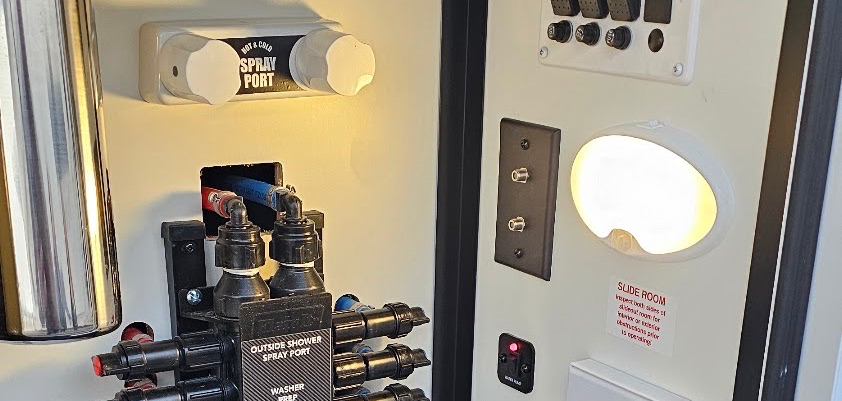
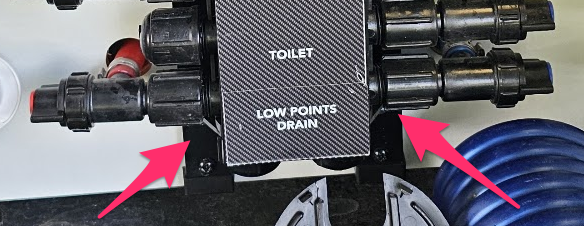
Locate the PEX Water Manifold System (behind the utility bay access panel or pass-through storage). Ensure all individual fixture distribution valves on the manifold are in the OPEN position so no water is trapped in isolated branch lines.
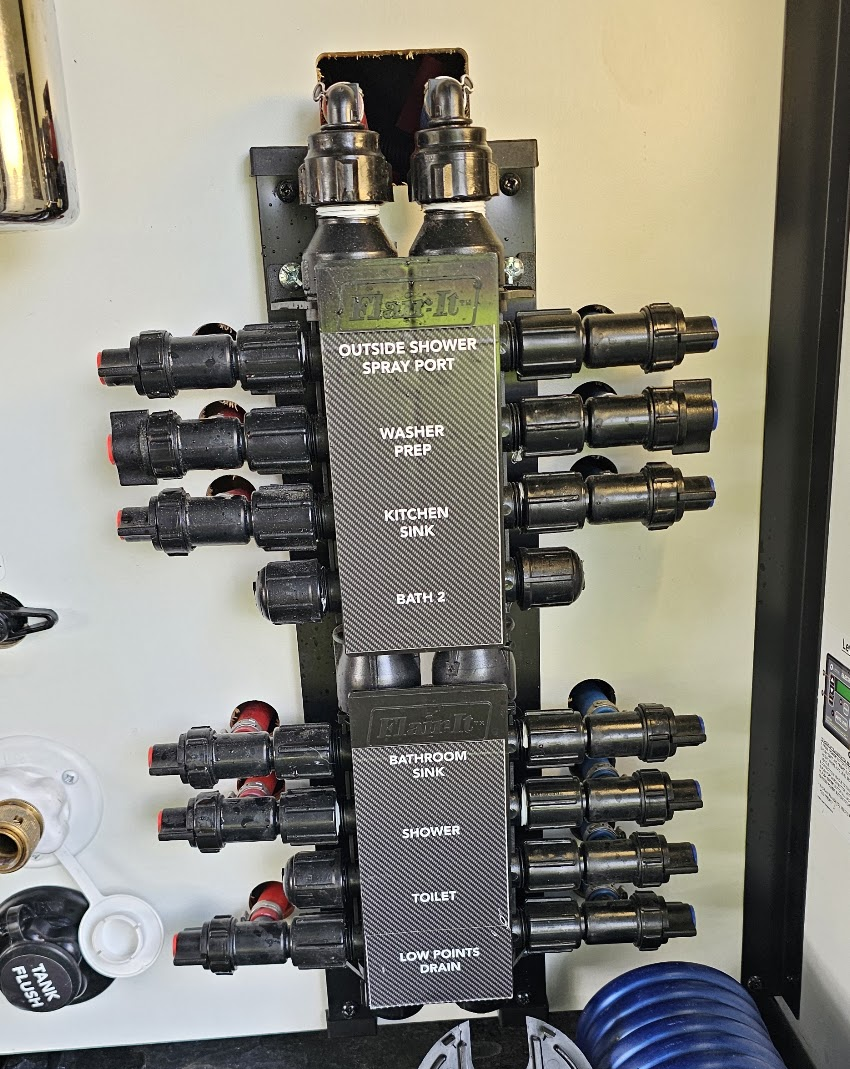
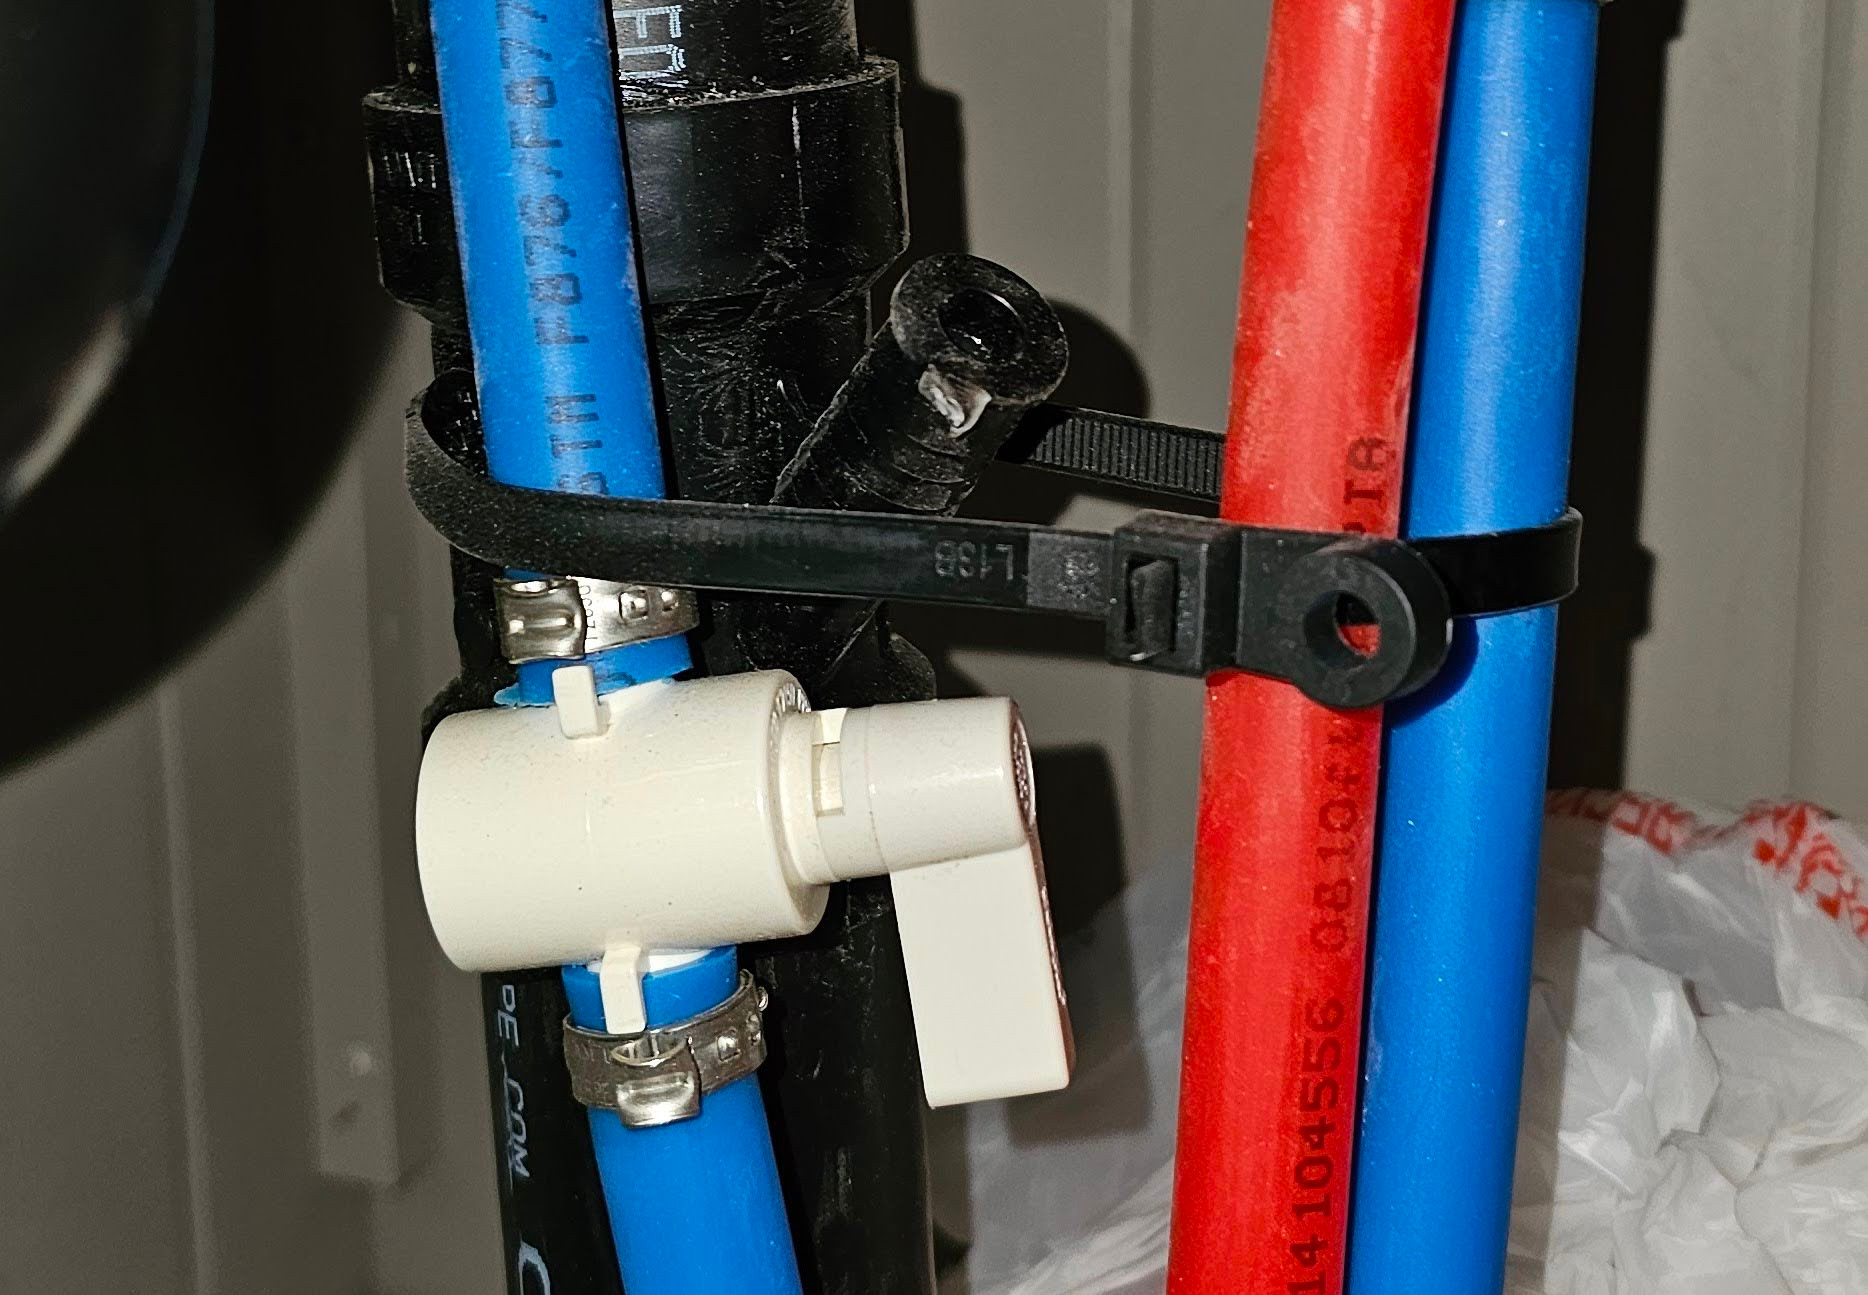
Locate the Low Point Drain Valves for the hot (red) and cold (blue) main lines.
Verify where the Low Point Drain Hoses exit underneath the underbelly of the rig so you know where the water will discharge.
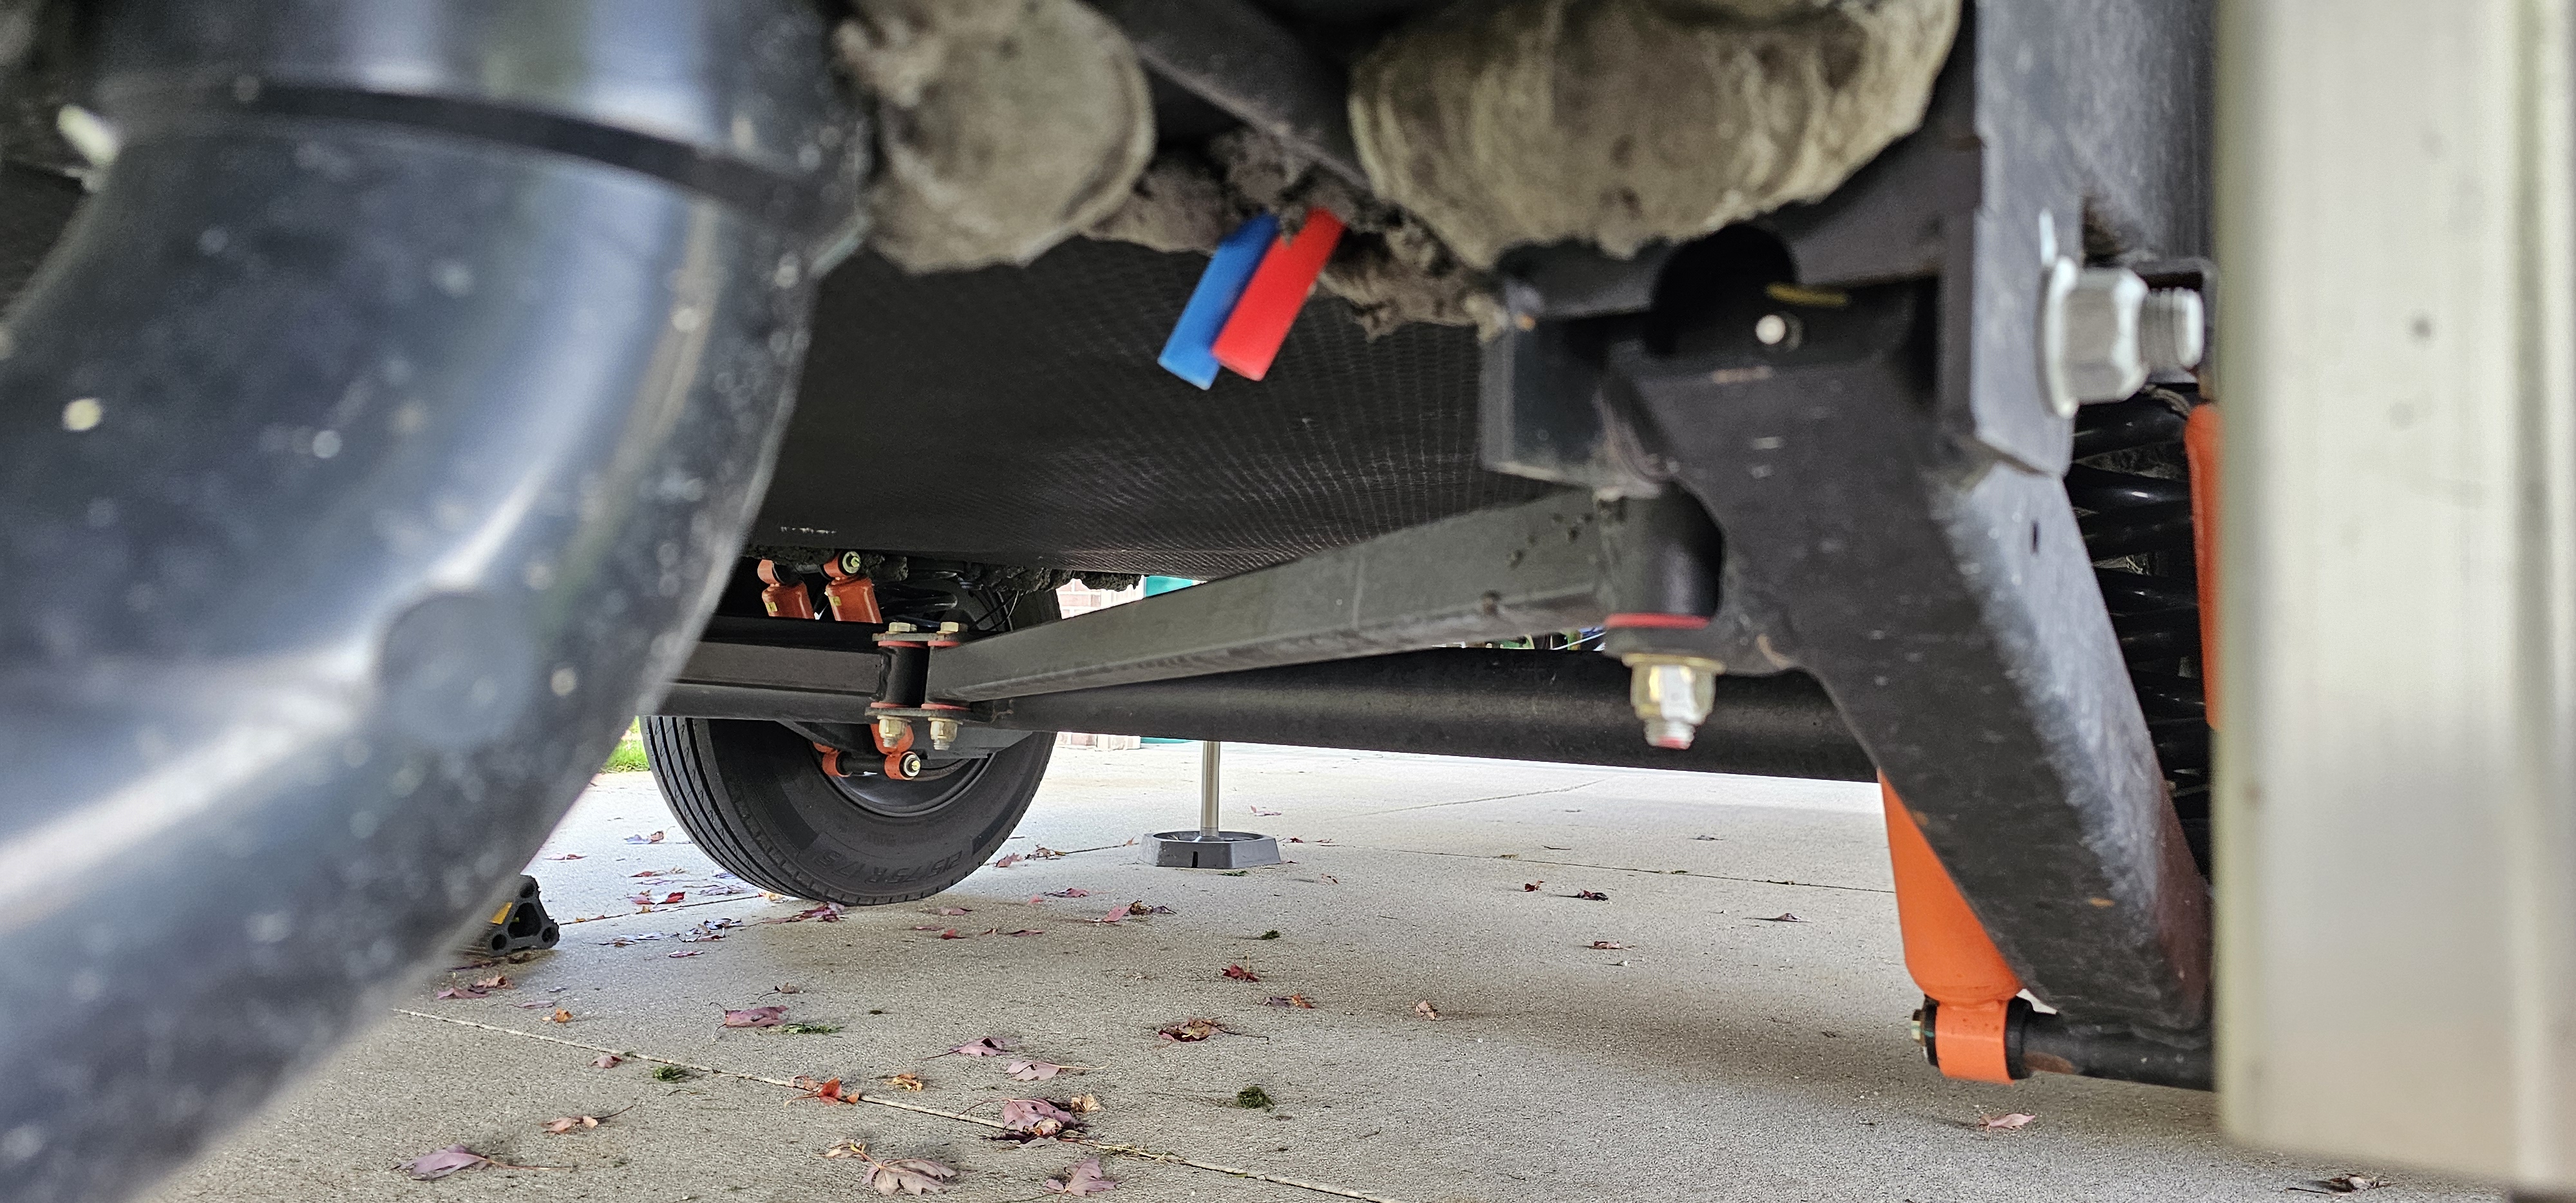
- Turn both the hot and cold low point drain valves to the OPEN position.
- Go inside the coach and open all faucets (kitchen, bathroom sink, and shower), hold down the toilet foot pedal briefly to clear the rim valve, and open the exterior utility shower faucets.
Step B: Emptying the Hot Water Tank (Two Methods)
Method 1: Routine Trip Close-Up (Via Low Point Drains & Pressure Relief Valve)
- Verify that both the gas and electric water heater switches are OFF and the water has cooled.
- Open the exterior water heater access door on the side of the RV.
Pull the lever on the Pressure Relief Valve at the top of the tank so it stays open. Allowing air into the top of the tank breaks the vacuum and lets the water drain back out through the open Low Point Drain Valves (Ensure the water heater bypass valves are in the Normal position so water can exit into the lines).
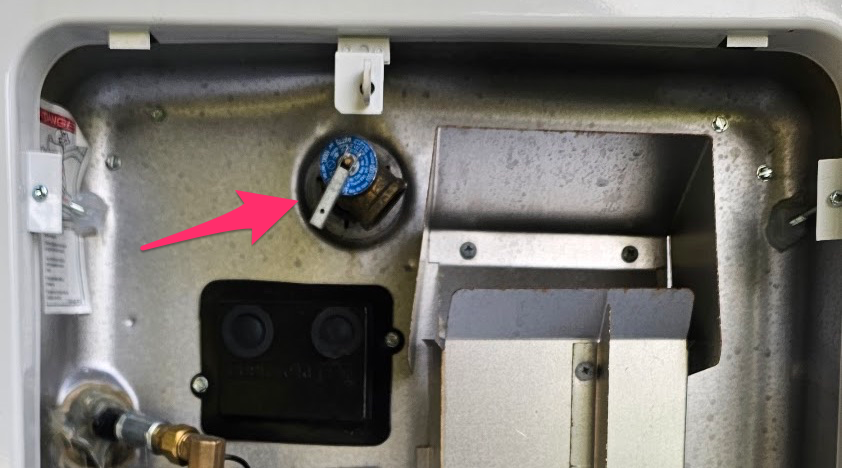
- Once the water stops flowing from the low point drain hoses under the rig, flip the pressure relief valve lever back to the closed position.
Method 2: End-of-Season / Pre-Winterization (Removing the Anode Rod)
- For a complete drain and sediment flush at the end of the season, open the Pressure Relief Valve to release any trapped pressure and vent the tank.
- Use a 1-1/16" socket to unscrew and remove the Anode Rod / Drain Plug at the bottom of the tank.
- Allow the remaining water at the very bottom of the tank to drain out the exterior housing, and rinse out any sediment with a tank wand if needed. Inspect the anode rod for wear and leave it out (stored safely inside the access cover) while winterizing or storing for the winter.
- Flip the pressure relief valve lever back to the closed position.
Step C: Final Line Close-Up
Once all water has finished draining from the underbelly hoses, close both Low Point Drain Valves and shut all interior and exterior faucets.